Curried Chicken Salad

This recipe comes from Nourishing Traditions by Sally Fallon and came to me by way of several different blogs. Like most recipes I make, it is scrawled on a notecard that lives in my recipe box.  Things are crossed out and added.  There are lots of notes in the margins about substitutions…  Getting a recipe that I got from somebody else is like playing a game of telephone. I probably messed it up (but I promise it still tastes good – it just may not taste like the original).
For my purposes, I only make a half batch of the recipe below. This is because I like to get 3 meals or multiple base ingredients for even more meals out of a fryer chicken.
For example, I might do something like this:
Night 1: Roasted chicken, sauteed veggies, and mashed potatoes
Night 2: Curried chicken salad on foccacia
Night 3: Chicken and dumplings (or I just make stock and freeze it. Or I make enchilda sauce.)
Night 4: Take fat skimmed off broth and use it as a base for creamed asparagus on toast.
There is something satisfying about using the whole bird. 
Curried Chicken Salad
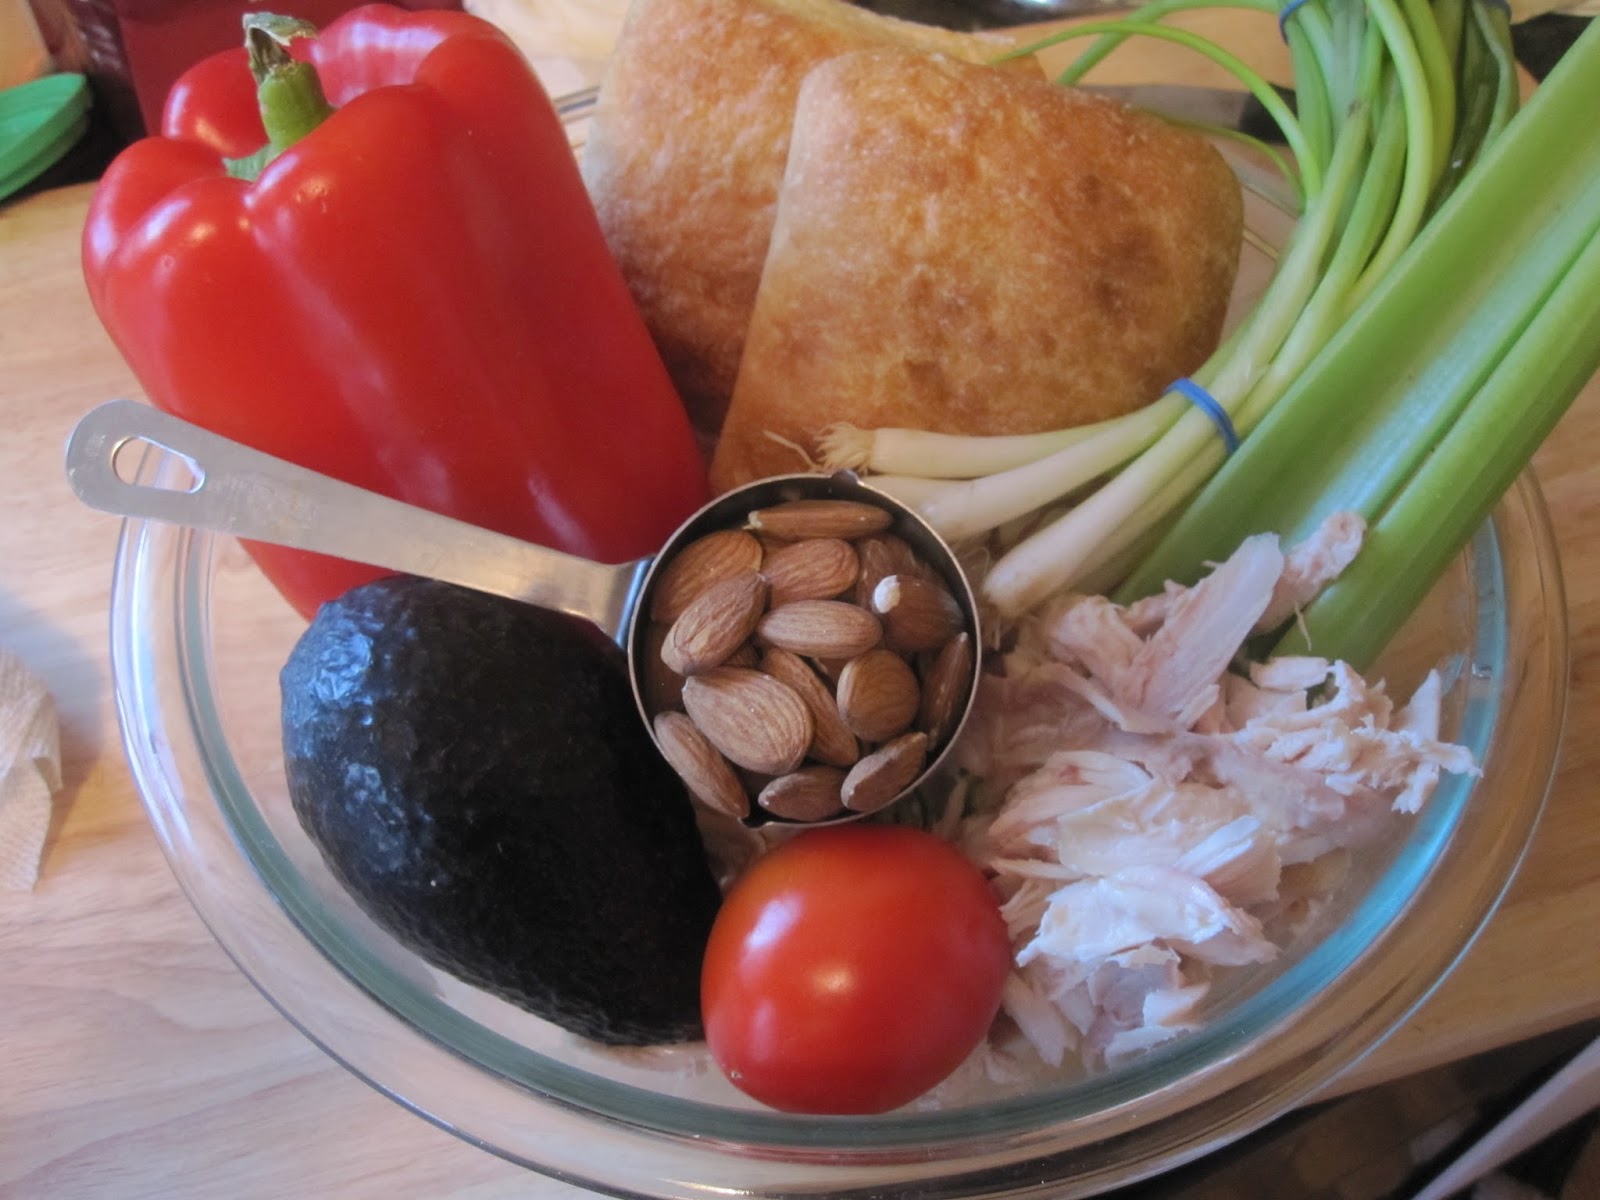
1 whole, cooked chicken – shredded
1 red bell pepper – finely diced
1 bunch green onions – finely chopped
3-4 stalks celery, diced
1/2 cup toasted almond slivers
2 cups curry mayonnaise
2 tomatoes, sliced
1 avocado ,sliced
Sprouts (if you are into that – I am, but the grocery store didn’t have any this time.)
This is what I use for the 2 cups curried mayonnaise:
  • 1 cup mayonnaise (homemade if you’re up to it) 
  • ¾ cup sour cream 
  • 3 tablespoons apple cider vinegar 
  • 3 tablespoons mild or medium curry powder 
  • ½ teaspoon ginger 
  • Cinnamon and salt to taste
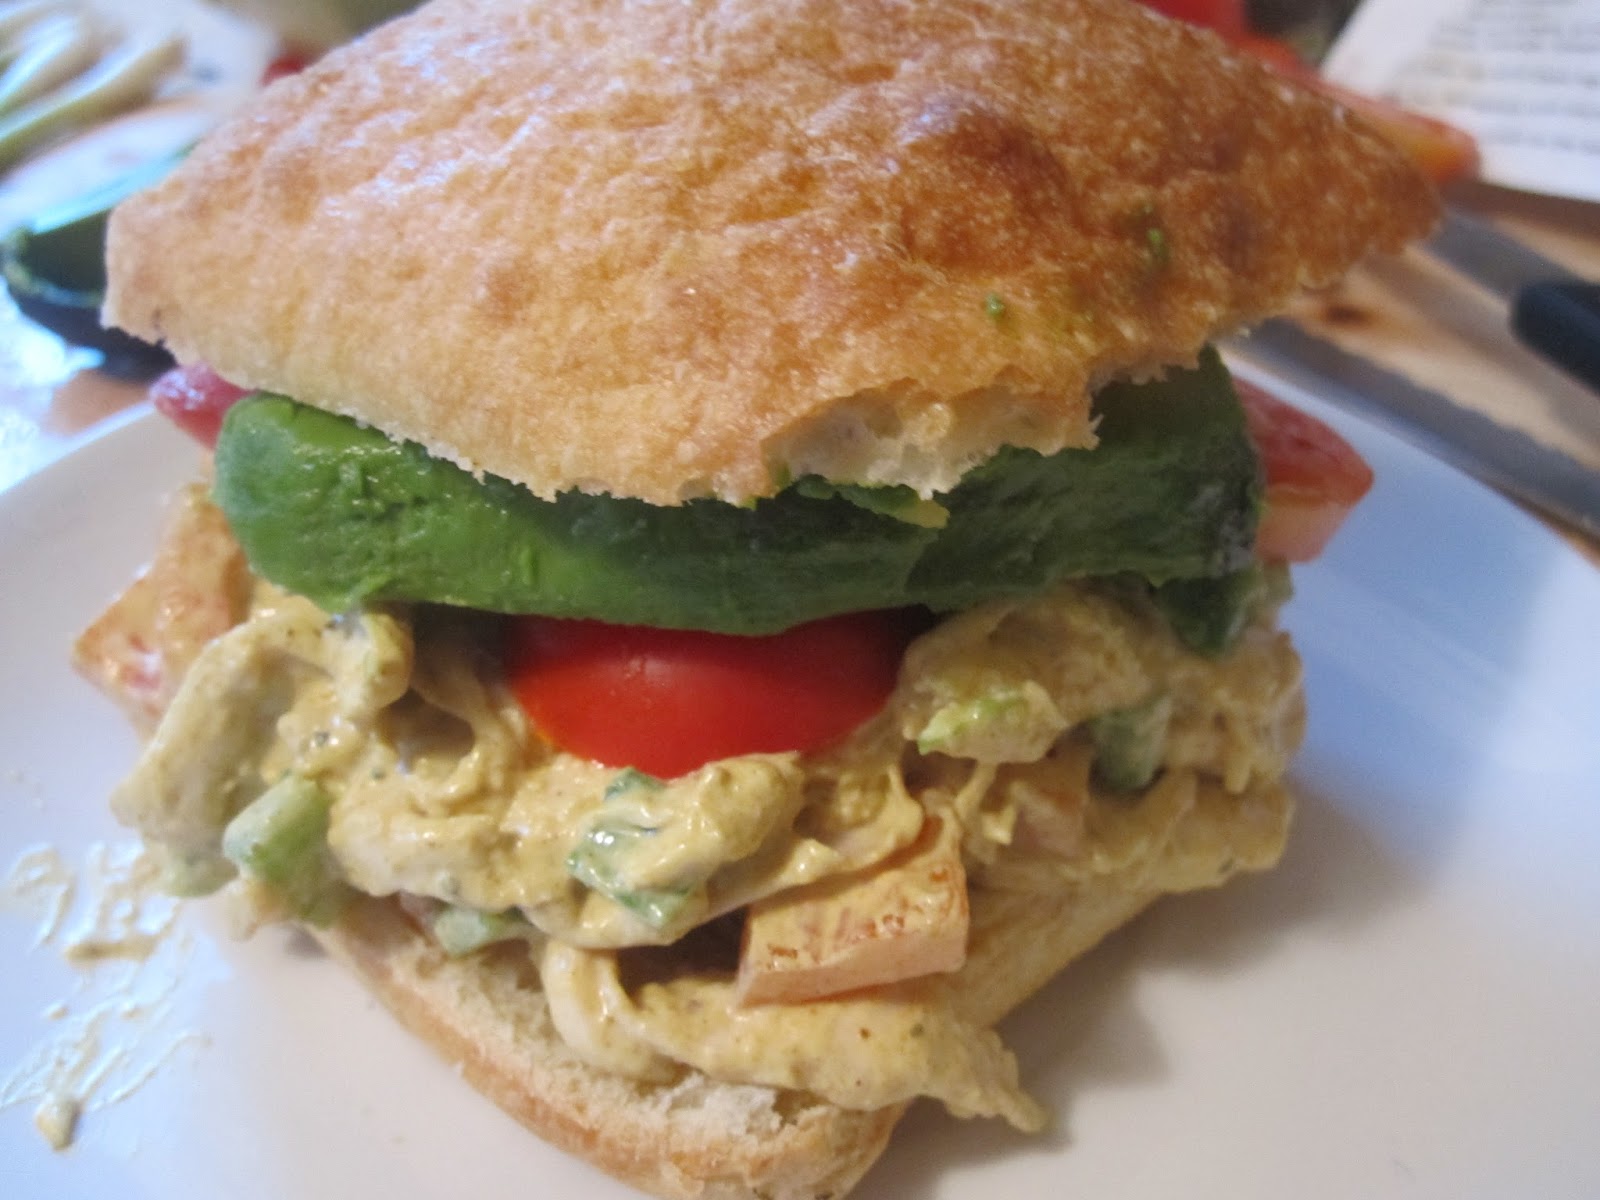
Simply mix the ingredients minus the tomato and avocado together.  Put on bread, on crackers, or in a pita along with tomato and avocado. Enjoy.

The curry mayo has some real zing, so for the little dude I put together a plate of the ingredients he will eat and mix half mayo/half sour cream as a dipping sauce. Gilbert takes dipping his food seriously.  Yesterday he dipped every single one of his blueberries into his milk before eating them…
At the point that Gilbert’s plate was assembled, he had made off with the camera.  As a compromise for its safe return, I helped him take a photo of his plate too.
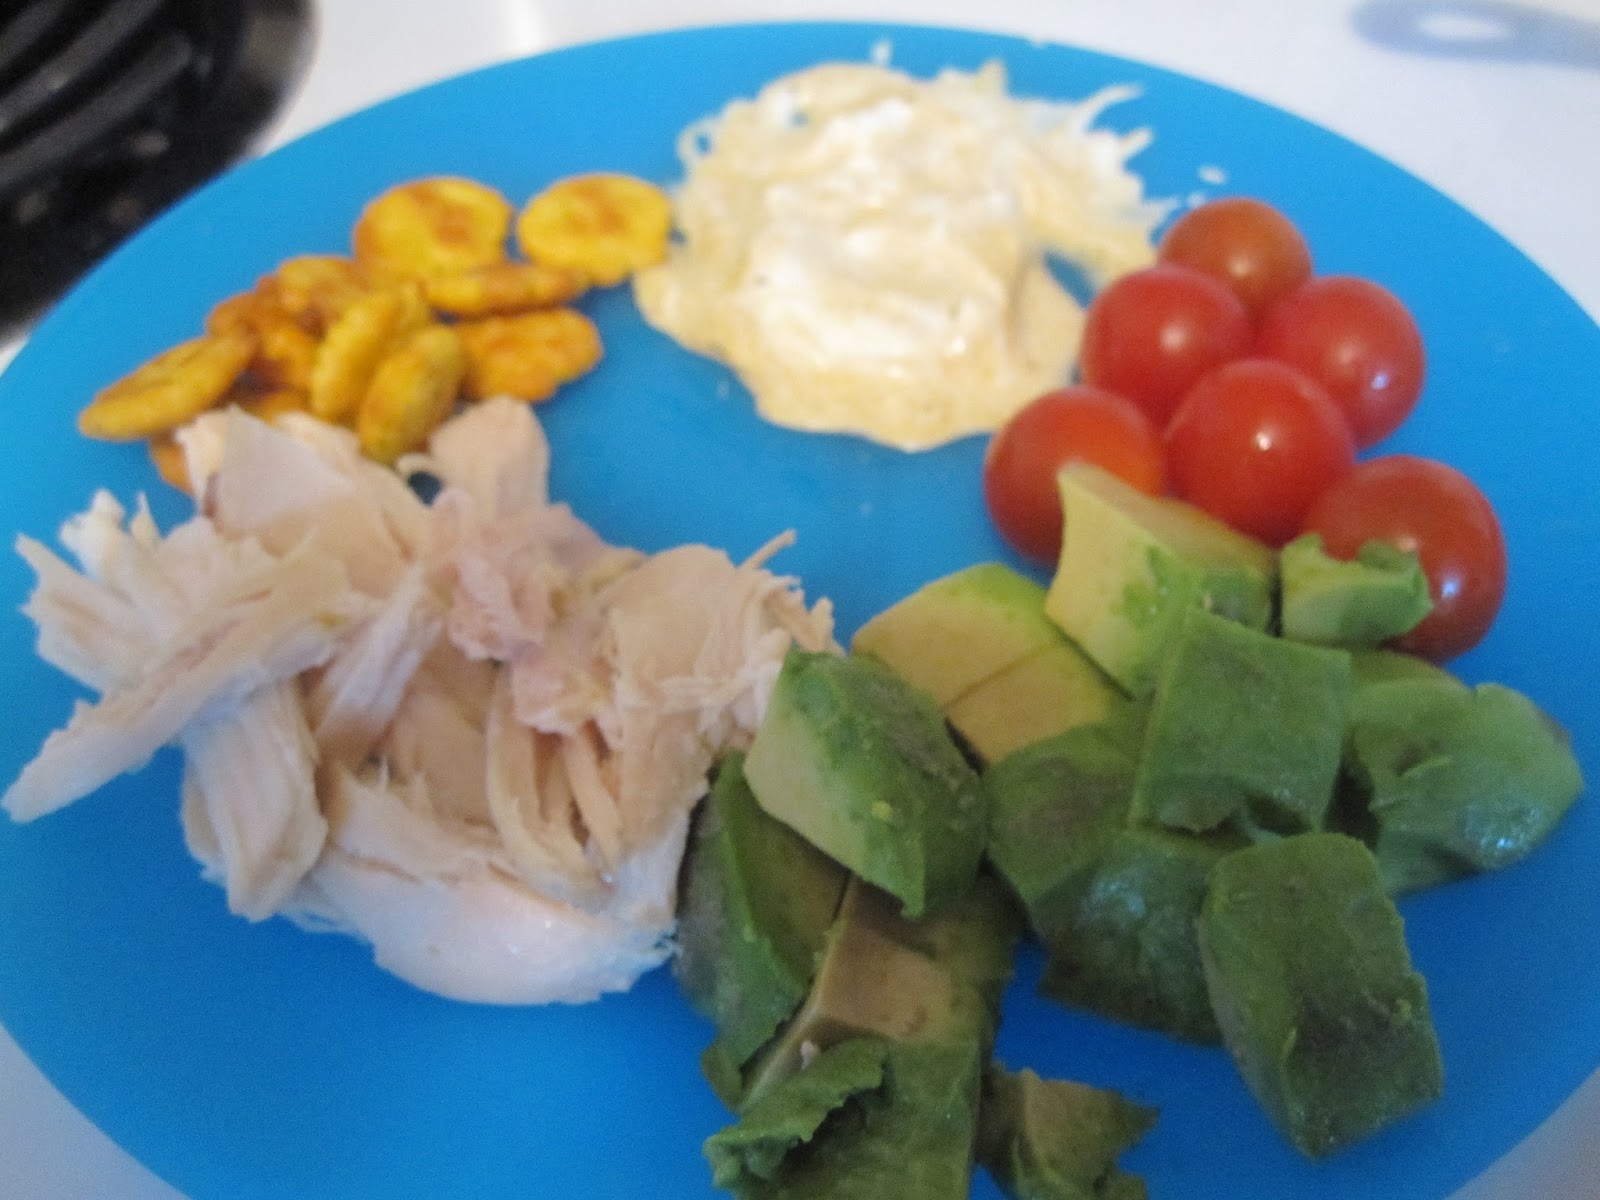
Photo by Gilbert

He thought being like mom was pretty cool.  You know… taking a picture of his food before he ate it.

I like it when my little dude thinks I’m awesome.  I’m going to enjoy it while it lasts.

Honey-sweetened, soaked zucchini bread

From the title, you already know what this post is really about, but let’s chat first.
I recently began soaking my flour.  What does that mean?  It means that I combine my flour with an acidic liquid medium and let it sit at room temp for 12 to 24 hours before I bake with it.  As the medium, you can use yogurt, cultured buttermilk, kefir, whey, vinegar, or lemon juice.  I’m sure there are others.  I generally use yogurt or buttermilk.
Why? It comes down to making the flour easier to digest and the nutrients more accessible to absorb.  Soaking breaks down the starches and proteins (gluten included).  It also neutralizes phytic acid, which makes certain minerals more readily available for our bodies to absorb.
I bet you are saying that you have recipes you already love and don’t know how to use soaked flour in them. Right?
That guide has been seriously helpful to me. With a little planning, it is not that hard to do or labor intensive to soak grains. Soaking flour requires a wopping 3 minutes that occurs 12-24 hours before you bake.
I am in the fledgling stages of exploring ways to eat healthier, so in the pursuit of actually making changes that are sustainable and avoiding undue stress, I don’t have a problem with not soaking flour when I forget to plan ahead or I don’t particularly like the results.
Seriously. Give it a try, but don’t stress about it.
Baby steps, my friend. I’m baby steppin’.
Now enough chit chat. Let’s get to the good stuff…. 
The delicious carbs.
If you are thinking this is a sweet, dessert-like bread, you will be disappointed. This is a meat and potatoes kind of quick bread.  I put butter and honey on it and Gilbert gobbled it down like a champ (a little, sticky-handed champ).
As we speak, I am soaking flour for two more batches. I’m going to freeze a couple loaves.
Honey-sweetened, soaked zucchini bread
3 cups whole wheat flour
2 cups buttermilk or plain yogurt
2 cups grated zucchini
3 pastured eggs
3/4 cup honey
1/4 cup melted butter (or coconut oil)
2 tsp baking soda
2 tsp vanilla
4 tsp cinnamon
1 tsp salt
12-24 hours before you make the bread, combine the flour and the buttermilk or yogurt.  Mix and cover with a plate.  Let it sit at room temperature up to 24 hours.
1 hour before you make the bread, grate the zucchini and mix it with the salt.  Let it sit for about an hour.  By the end of the hour, you will see water has pooled at the bottom of the bowl.  
Strain out the water and pat the zucchini dry.  Turn the oven on to 350.
Add the rest of the ingredients (aka the zucchini, eggs, butter, honey, cinnamon, vanilla, and baking soda) to the bowl with your soaked flour.
Mix until you have a nice batter.  Pour into a greased bread pan (9×4).  Place in oven and bake for 1 1/2 hours, until toothpick comes out clean.
Once it has cooled for a few minutes, I recommend taking it out of the pan to finish cooling.
 
Doesn’t that look good?  Fresh out of the oven and still warm.  I put butter and peach and honey jam on it.
There is a small chance I ate half the loaf by myself…  
I promise I will be good and freeze the next two loaves.